How to Build an Ecommerce Site Using Bubble?
Building an ecommerce site can seem daunting, especially if you lack coding skills. Enter Bubble, a powerful no-code platform that simplifies web development and makes it accessible to everyone. Bubble's visual programming interface allows you to create complex web applications, including ecommerce websites, without writing a single line of code.
Here, in this blog, you will learn how to build a Shopify website and an app for ecommerce using Bubble.
Why Use Bubble for Ecommerce Website Development?
Here are some reasons why Bubble is a great choice for building your ecommerce database:
- User-Friendly Interface: Bubble's drag-and-drop editor enables you to design your site intuitively.
- Customizability: Tailor every aspect of your site to meet your specific needs without limitations.
- Scalability: As your business grows, Bubble can handle increased traffic and transactions seamlessly.
- Integration Capabilities: Easily connect with third-party services like payment gateways and CMS platforms.
- SEO Tools: Built-in SEO features help drive organic traffic to your ecommerce site.
- Cost-Efficiency: Avoid high development costs by building your own site with Bubble.
Using the Bubble platform, you can turn your ecommerce vision into reality, empowering even non-technical entrepreneurs to create professional online stores.
Determine Your Business Model and Target Audience
Defining the business model and target audience is a crucial first step in the ecommerce site-building process. This foundational work will guide every decision you make, from product selection to marketing strategies, ensuring that your online store meets the needs of your intended customers and achieves your business goals.
Determining Your Business Model
Start by clarifying what type of ecommerce business you want to run. Common models include:
- B2C (Business to Consumer): Selling products directly to consumers.
- B2B (Business to Business): Offering products or services to other businesses.
- C2C (Consumer to Consumer): Providing a platform for consumers to trade items with each other.
- Subscription Services: Charging a recurring fee for access to products or services.
Consider factors like startup costs, scalability, revenue potential, and market demand while deciding on a model.
Identifying Your Target Audience
Follow these steps to pinpoint your ideal customer:
Conduct Market Research:
- Use tools like Google Trends, surveys, or focus groups to gather data.
- Analyze competitors' audiences through their social media channels and reviews.
Create Customer Personas:
- Develop detailed profiles of your ideal customers based on demographics (age, gender, income), psychographics (interests, values), and buying behaviors.
Segment Your Audience:
- Divide your broader audience into smaller segments for more personalized marketing efforts.
Test and Refine:
- Use analytics tools to monitor how different segments interact with your site.
- Adjust your strategies based on performance data.
Select the Best Platform and Content Management System (CMS) for Your Online Store
Choosing the right platform and content management system (CMS) is crucial for the success of your ecommerce site. The combination you select impacts flexibility, scalability, and SEO capabilities of your online store. When evaluating options, consider the following aspects:
- Flexibility: Ensure the platform allows customization to meet your specific business requirements.
- Scalability: Choose a solution that can grow with your business, handling increased traffic and product listings.
- SEO Capabilities: Opt for a platform that supports essential SEO practices like custom meta tags, clean URLs, and fast loading times.
Overview of Popular Platforms and CMS Options
Several platforms and CMS options are available for building online stores:
- Shopify Pros: User-friendly interface, extensive app marketplace, excellent customer support.
- Cons: Monthly fees, limited customization without coding.
- WooCommerce (WordPress)Pros: Highly customizable, large community support, no monthly fees (besides hosting)
- Cons: Requires some technical knowledge, dependent on WordPress plugins
- MagentoPros: Powerful features, highly scalable, suitable for large businesses
- Cons: Complex setup process, higher cost for advanced features
Among these options, Bubble stands out as a unique platform due to its built-in visual programming interface. Bubble is particularly advantageous for non-technical entrepreneurs who want to create professional web applications without writing code.
How to Build an Online Store Using Shopify?
Creating an online store with Shopify is a straightforward process, thanks to its user-friendly platform designed for both beginners and experienced users. Shopify provides all the tools you need to set up, customize, and manage an online store. Here’s a comprehensive guide to help you get started.
1. Sign Up for a Shopify Account
- Visit Shopify’s Website: Go to the official Shopify website.
- Sign Up: Click on the “Get Started” button and fill in your email address, password, and store name. Follow the prompts to complete the sign-up process.
2. Set Up Your Store
- Basic Information: Enter your basic information, including business name, address, and contact details.
- Store Preferences: Configure your store preferences, such as the primary purpose of your store (selling products online, in person, etc.). Here, you will learn how to copy a Shopify store.
3. Choose a Shopify Plan
- Explore Plans: Shopify offers several pricing plans. Review the features of each plan and choose the one that best fits your needs.
- Free Trial: You can start with a 14-day free trial to explore the platform before committing to a paid plan.
4. Customize Your Online Store
- Select a Theme: Choose a theme from Shopify’s clone store. There are free and paid options available. Select a theme that aligns with your brand and products.
- Customize Your Theme: Use the theme editor to customize the look and feel of your store. You can adjust colors, fonts, and layouts to match your brand identity.
- Add Logos and Images: Upload your logo and high-quality images for your products. Visual appeal is crucial for attracting customers.
5. Add Products to Your Store
- Product Information: Go to the “Products” section and click “Add Product.” Enter the product title, description, price, and SKU (stock keeping unit).
- Product Images: Upload high-quality images of your products. Make sure to include multiple angles and close-ups.
- Inventory and Variants: Set up inventory tracking and add variants (e.g., different sizes, colors) if applicable.
- SEO Optimization: Optimize your product listings with relevant keywords, meta titles, and descriptions to improve search engine visibility.
6. Set Up Payment Gateways
- Payment Providers: Go to the “Settings” section and click on “Payments.” Choose the payment gateways you want to use, such as Shopify Payments, PayPal, or other third-party providers.
- Configure Settings: Enter the necessary details and configure your payment settings to ensure secure transactions.
7. Configure Shipping Settings
- Shipping Zones: Define your shipping zones and rates based on the regions you plan to ship to.
- Shipping Methods: Choose the shipping methods you’ll offer, such as standard shipping, express shipping, and local pickup.
- Shipping Labels: Set up shipping label printing to streamline your order fulfillment process.
8. Set Up Taxes
- Tax Settings: Go to the “Settings” section and click on “Taxes.” Configure your tax settings based on your business location and the regions you sell to.
- Automatic Calculation: Shopify can automatically calculate taxes for your orders based on the information you provide.
9. Launch Your Store
- Review Settings: Double-check all your settings, products, and customizations to ensure everything is correct to build Shopify store.
- Remove Password: If you’ve been working on your e-store app in development mode, remove the password protection to make your free online store app live.
- Domain Name: Set up your domain name. You can build your own clone store app for free and buy a new domain through Shopify or connect an existing one.
10. Market Your Store
- SEO Optimization: Ensure your store is optimized for search engines with relevant keywords, meta tags, and alt texts for images while building a Shopify site.
- Social Media: Promote your store on social media platforms to attract customers built for Shopify.
- Email Marketing: Use email marketing campaigns to reach out to potential customers and keep existing customers engaged.
Why Bubble is a Great Choice?
Bubble CMS provides several benefits:
- Visual Development: Build your ecommerce site using drag-and-drop elements without any coding knowledge.
- Customizable Design: Create online store app free with the help of unique user experiences tailored to your brand's identity.
- Scalable Infrastructure: Handle increasing traffic with ease thanks to Bubble's robust backend capabilities.
- Integration-Friendly: Seamlessly connect with third-party tools such as payment gateways and marketing platforms.
By leveraging Bubble's visual programming interface, you streamline the development process while ensuring your ecommerce site remains flexible and scalable. This approach empowers you to focus on other critical aspects of your business like marketing and customer engagement.
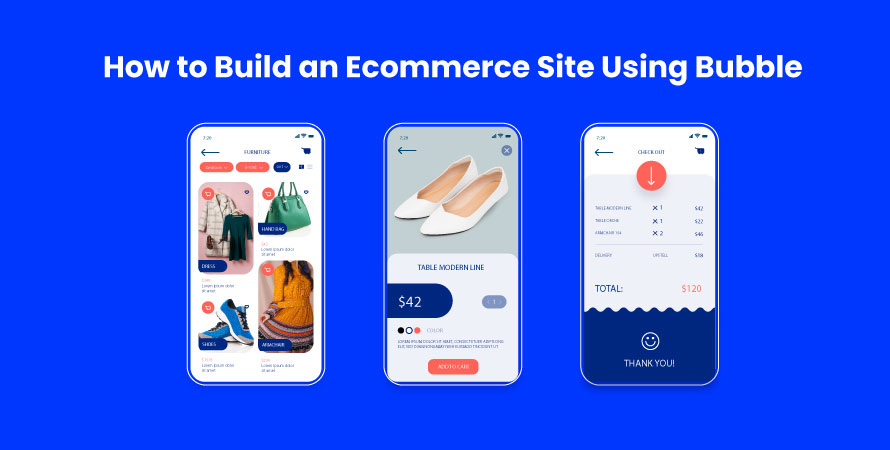
Planning Your Ecommerce Website Structure and Design
Creating a well-organized ecommerce website structure is essential for ensuring smooth user navigation and optimizing conversion paths. A clear structure helps visitors easily find products, understand the site's offerings, and complete purchases with minimal friction. On the other hand, a disorganized site can frustrate users, leading to higher bounce rates and lost sales.
How to Plan Your Ecommerce Website Structure?
When planning your ecommerce website structure, consider the following elements:
- Product Categories: Organize products into logical categories and subcategories. This helps users quickly locate what they're looking for. For example, an online fashion store might have categories like Men's Clothing, Women's Clothing, Accessories, etc.
- Intuitive Menus: Design menus that are easy to navigate. Use dropdowns or mega menus to display categories and subcategories clearly. Ensure that every page is accessible within a few clicks.
- User-Friendly Shopping Cart: The shopping cart should be easily accessible from any page on the site. Include features such as product thumbnails, quantity adjustments, and a clear call-to-action button for checkout.
Why Responsive Design Matters for Mobile Devices?
With a growing number of shoppers using mobile devices, responsive design is crucial for ecommerce success. A mobile-friendly site ensures that users have a seamless experience regardless of the device they use.
Tips for Creating a Mobile Version of Your Site:
- Simplify Navigation: Use a hamburger menu to save screen space and keep navigation clean.
- Optimize Images: Ensure images load quickly on mobile devices by compressing them without losing quality.
- Touch-Friendly Elements: Make buttons large enough to be easily tapped with a finger.
- Streamlined Checkout Process: Simplify forms and reduce the number of steps in the checkout process to minimize cart abandonment.
A well-planned ecommerce website structure combined with an engaging design can significantly enhance user experience and drive more conversions. By focusing on these elements from the start, you set a strong foundation for your online store's success.
Implementing Key Ecommerce Features with Bubble
Implementing essential ecommerce features is crucial for building a functional and user-friendly online store. With Bubble's no-code platform, you can easily add these key features:
1. Secure Payment System and Product Catalog
Every ecommerce site must include:
- A secure payment system: Ensuring customer transactions are safe builds trust and credibility.
- Comprehensive product catalog: Displaying products in an organized manner helps users find what they're looking for quickly.
2. Leveraging Bubble's Visual Development Approach
Bubble's visual development approach allows you to implement these features without writing code:
- Plugins and APIs: Utilize Bubble's extensive library of plugins and APIs to enhance your ecommerce site. For instance, the Stripe plugin enables you to integrate a secure payment gateway seamlessly.
- Drag-and-drop interface: Design your product catalog by dragging and dropping elements, making it easy to create visually appealing layouts.
3. Setting Up Payment Gateway Integration
To set up a payment gateway like Stripe:
- Install the Stripe Plugin: Navigate to the Plugins tab in Bubble, search for "Stripe," and click "Install."
- Configure API Keys: Obtain your Stripe API keys from your Stripe account dashboard. Enter these keys into the plugin settings within Bubble.
- Create Payment Workflows: Use Bubble’s workflow editor to set up actions such as processing payments when a customer makes a purchase.
4. Dynamically Displaying Product Listings
Dynamic product listings allow for real-time updates to your product catalog:
- Database Setup: Create a database in Bubble to store product information such as names, prices, descriptions, and images.
- Repeating Groups: Use repeating groups to display products dynamically on your website. This way, any changes in the database automatically reflect on the frontend.
- Filters and Sorting Options: Enhance user experience by adding filters and sorting options so customers can easily navigate through products.
Bubble simplifies integrating essential ecommerce features like secure payments and dynamic product listings, making it an excellent choice for building your online store.
Enhancing Your Ecommerce Site for SEO and Performance
Optimizing an ecommerce site for search engines is crucial in driving organic traffic and ensuring fast loading times, which contributes to a seamless user experience.
SEO Tips for Bubble Websites
- Meta Tags and Descriptions: Properly optimized meta tags and descriptions allow search engines to understand the content of your pages. Within Bubble, you can set meta tags by navigating to the "SEO" tab under page settings.
- URLs: Clean and descriptive URLs improve both user experience and SEO. Bubble allows you to customize URLs, making it easier to include relevant keywords.
- Alt Text for Images: Adding alt text to images helps search engines index your visuals better. This can be done directly within Bubble's image settings.
Performance Optimization Techniques
- Image Compression: Large image files can slow down your site. Tools like TinyPNG or ImageOptim compress images without losing quality, enhancing load times.
- Caching: Implementing caching strategies ensures that returning visitors experience faster load times. Bubble offers built-in options for managing data caching.
- Minimize HTTP Requests: Reducing the number of elements on each page that need HTTP requests can significantly speed up performance. This includes combining multiple CSS or JavaScript files into one.
Conclusion
Exploring the potential of Bubble for your ecommerce site opens up a world of possibilities. With its no-code platform, even those without technical backgrounds can create highly functional online stores.
The benefits of using Bubble for e-commerce are numerous:
- Scalable infrastructure: As your business grows, Bubble scales with you, ensuring your site can handle increased traffic and transactions.
- Customizable design: Tailor every aspect of your store to align with your brand's identity, offering a unique shopping experience to your customers.
- Integrations: Seamlessly connect with other CMS platforms, third-party payment options, and popular SEO and analytical tools.
The dream of building a successful online store is within reach. Start experimenting with Bubble today and bring your ecommerce vision to life.